参考文档
鸟哥的Linux私房菜-WWW伺服器 http://linux.vbird.org/linux_server/0360apache.php
实验环境&内容
系统 Red Hat Enterprise Linux Server release 6.5
如果能成功安装并运行wordpress就说明搭建成功了。
安装软件
[root@vserver1 ~]# yum install httpd mysql mysql-server php php-mysql
Apache
Apache httpd 可以按默认配置运行。
# /etc/init.d/httpd start
修改php配置
修改 /etc/php.ini
register_globals = Off
log_errors = On
ignore_repeated_errors = On
ignore_repeated_source = On
display_errors = Off
display_startup_errors = Off

post_max_size = 8M
file_uploads = On
upload_max_filesize = 2M
memory_limit = 128M

short_open_tag = On
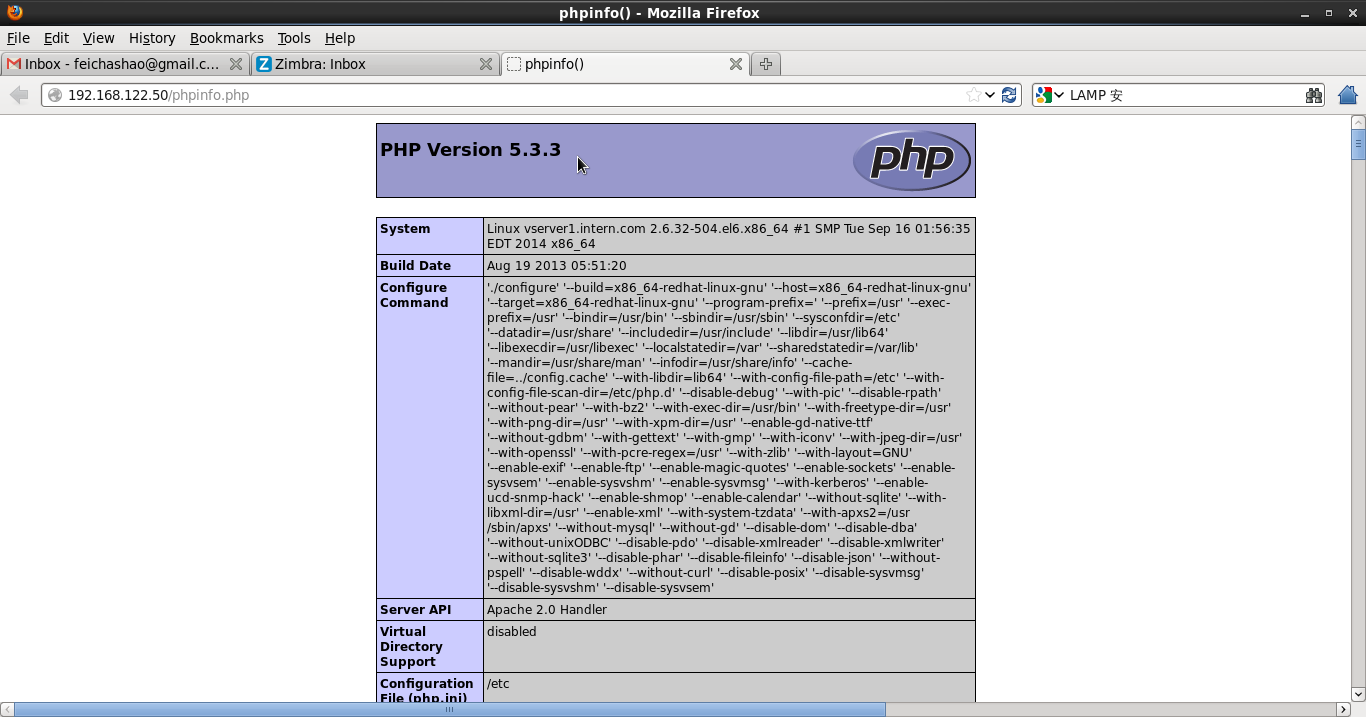
要测试php是否安装成功,可以建立/var/www/html/phpinfo.php文件,内容为
这里服务器IP地址为192.168.122.50,用浏览器访问 http://192.168.122.50/phpinfo.php
如果能看到类似如下页面,则说明php安装成功。
Mysql
[root@vserver1 mysql]# /etc/init.d/mysqld start
[root@vserver1 www]# cp /usr/share/mysql/my-medium.cnf /etc/my.cnf
[root@vserver1 www]# mysql_secure_installation
一路按Y。
iptables & selinux
在/etc/sysconfig/iptables 中加入两行
-A INPUT -p tcp -m state --state NEW -m tcp --dport 80 -j ACCEPT
-A INPUT -p tcp -m state --state NEW -m tcp --dport 3306 -j ACCEPT (如果php跟mysql装在同一机器上,不需要这条)
SELinux要注意html文件的context值,还应关注httpd_can_network_connect --> on
[root@vserver1 ~]# getsebool -a | grep httpd
allow_httpd_anon_write --> off
allow_httpd_mod_auth_ntlm_winbind --> off
allow_httpd_mod_auth_pam --> off
allow_httpd_sys_script_anon_write --> off
httpd_builtin_scripting --> on
httpd_can_check_spam --> off
httpd_can_network_connect --> off
httpd_can_network_connect_cobbler --> off
httpd_can_network_connect_db --> off
httpd_can_network_memcache --> off
httpd_can_network_relay --> off
httpd_can_sendmail --> off
httpd_dbus_avahi --> on
httpd_enable_cgi --> on
httpd_enable_ftp_server --> off
httpd_enable_homedirs --> off
httpd_execmem --> off
httpd_manage_ipa --> off
httpd_read_user_content --> off
httpd_run_stickshift --> off
httpd_serve_cobbler_files --> off
httpd_setrlimit --> off
httpd_ssi_exec --> off
httpd_tmp_exec --> off
httpd_tty_comm --> on
httpd_unified --> on
httpd_use_cifs --> off
httpd_use_fusefs --> off
httpd_use_gpg --> off
httpd_use_nfs --> off
httpd_use_openstack --> off
httpd_verify_dns --> off
安装WordPress
在WordPress官网下载源码包, https://cn.wordpress.org/
解压后,将wordpress目录下的所有文件复制到/var/www/html下。
要注意文件权限,如果./var/www/html这个目录没有写权限,那么安装过程可能要按说明自行创建文件。
服务器的IP是192.168.122.50,所以接下来用浏览器打开 http://192.168.122.50
应该就能看到wp的安装引导啦。
数据库名默认是mysql
用户名root (最好另外建立用户)
密码是安装mysql时配置的密码。

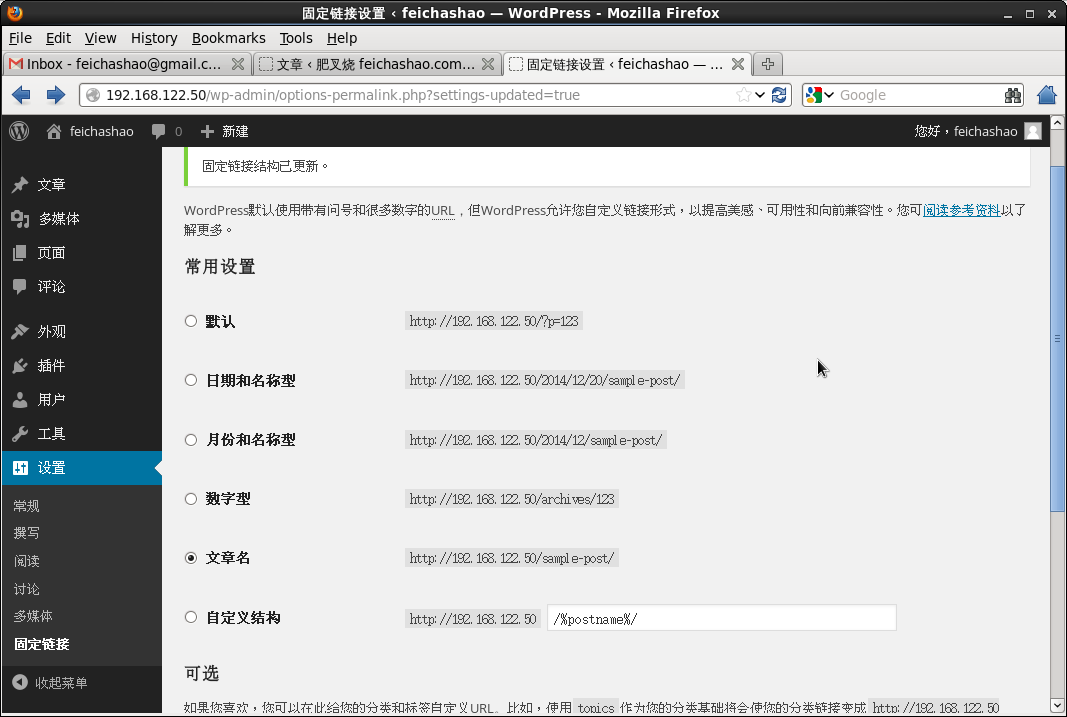
rewrite
如果想用类似http://192.168.122.50/hello-world/ 这样的链接来访问文章,那么需要apache允许rewrite功能。
修改/etc/httpd/conf/httpd.conf 将AllowOverride 设置成 All
    Options Indexes FollowSymLinks
    AllowOverride All
    Order allow,deny
    Allow from all
重启httpd服务。
在wordpress里设置固定链接就成了。